Tennessee Tax Template
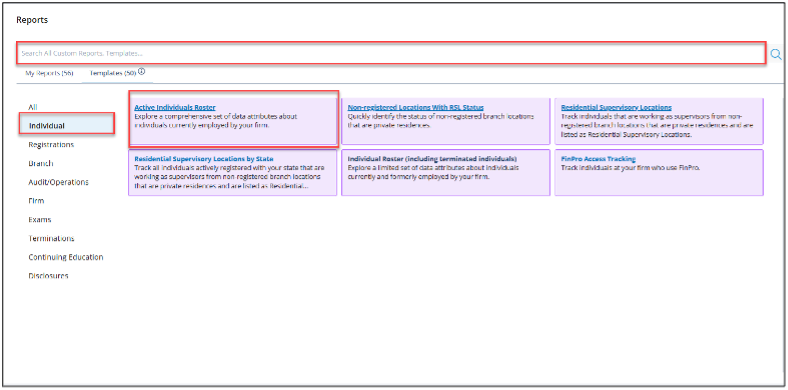
Create a Tennessee Tax Template for your firm by logging in to FINRA Gateway, clicking on the Reports tab, and selecting the Active Individuals Roster. You can find the Active Individuals Roster by using the search bar or browsing to Templates and choosing the Individual category.
After completing the steps detailed on this page, you will have a report like the sample report linked here.
Customized Active Individuals Roster Report
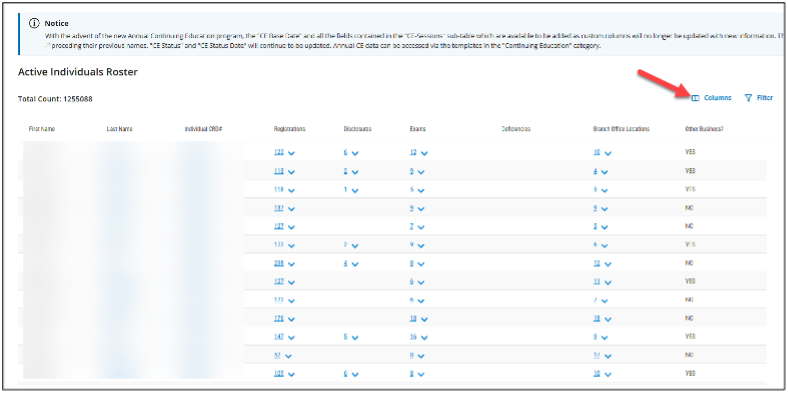
Once you have opened the Active Individuals Roster you can start customizing it, so it provides you with the information you need.
To customize the fields in the report, start by clicking on the Columns icon in the upper righthand side of the screen.
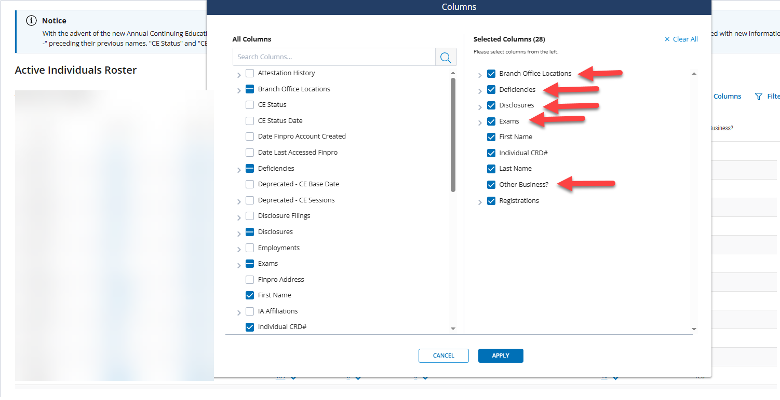
Once the Columns dialog box is open, remove all the columns that you don’t need for the template. This will streamline the output you get at the end. Remove the following columns by unchecking the checkbox next to the item in the lefthand column of the dialog box.
- Branch Office Locations
- Deficiencies
- Disclosures
- Exams
- Other Business?
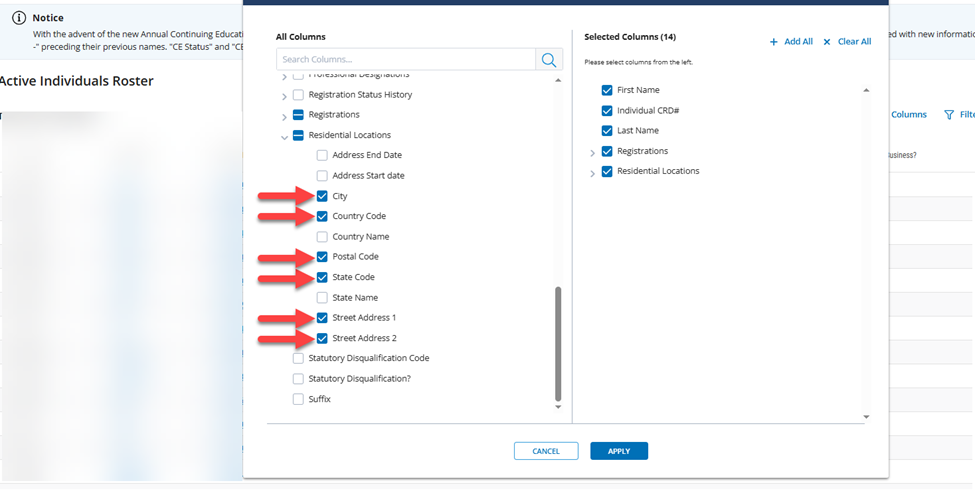
Now you can add all the fields that you need by checking the checkboxes next to them in the lefthand side of the Columns dialog box.
After locating the Residential Locations section by either scrolling to it or by searching for it in the search box, expand the Residential Locations section by clicking on the caret (>) next to it.
After expanding the section, select the following fields:
- City
- Country Code
- Postal Code
- State Code
- Street Address 1
- Street Address 2
Then click on the Apply button at the bottom of the Columns dialog box
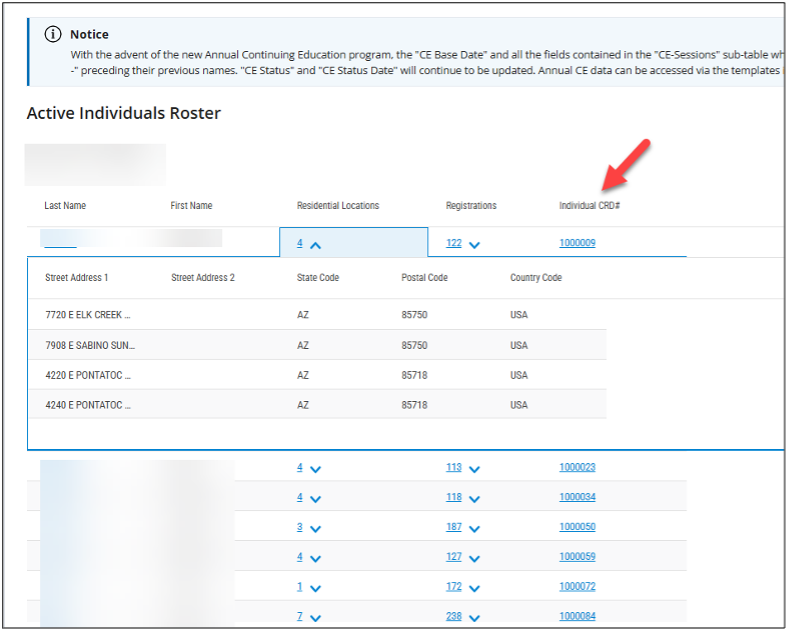
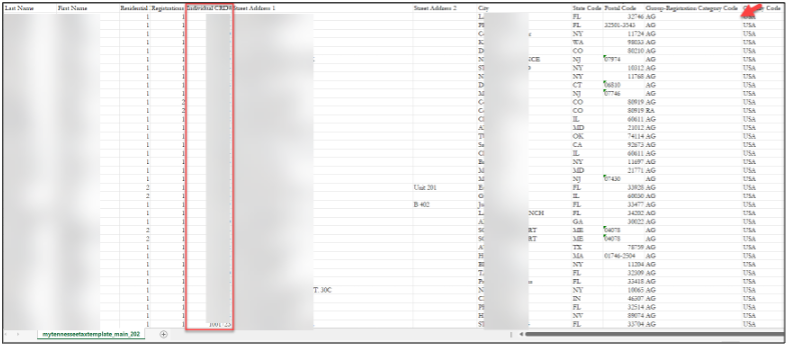
Now that you have all the columns you need, you will want to re-order the columns in your report to match the Tennessee template.
You can re-order the columns by clicking on the column headers and dragging the column to the desired location. Arrange the columns in the following order:
- Last Name
- First Name
- Residential Location
- Registrations
- Individual CRD#
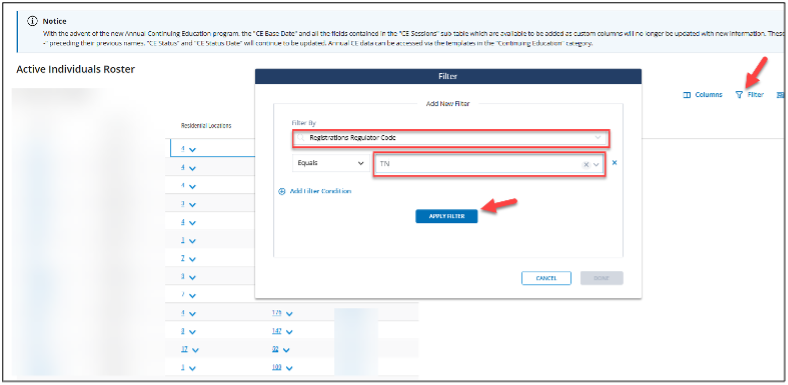
After re-ordering the columns, open the Filter dialog by clicking on the filter icon in the upper righthand section of the report.
Once the filter dialog is open, navigate to the Registrations-Regulator Code field (by scrolling or by typing it into the Filter By box) and select it.
Then select TN from the dropdown select box and click on the Apply Filter button.
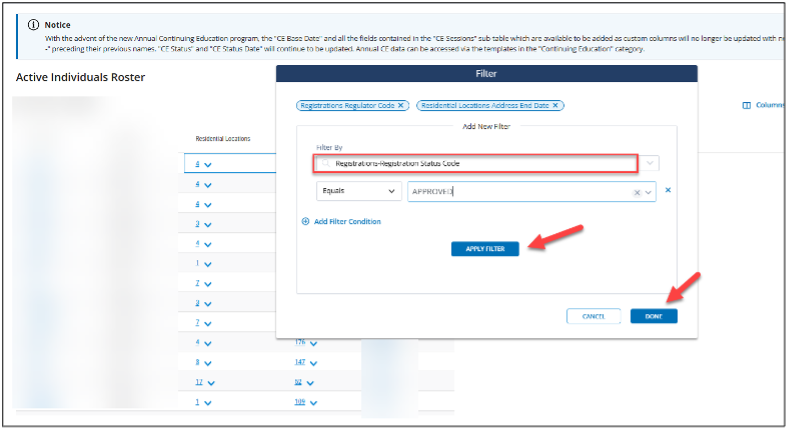
Next, in the same filter dialog box, navigate to the Registrations-Registration Status Code field (by scrolling or by typing it into the Filter By box) and select it.
Then select APPROVED from the dropdown select box and click on the Apply Filter button.
Finally, click on the Done button to close the filter dialog box.
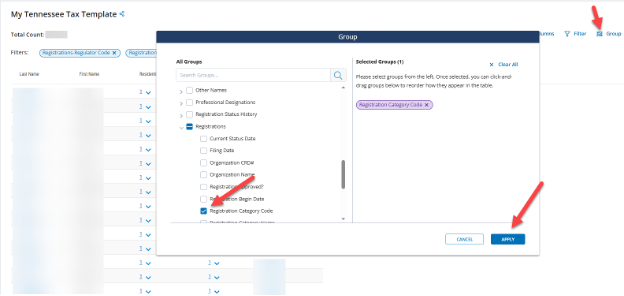
After closing the filter dialog box, click on the Group icon in the upper righthand corner of the report to open the Group dialog box.
In the Group dialog box, navigate to the Registration Category Code field under the Registration group and check the box next to it.
Click on the Apply button in the bottom righthand corner of the Group dialog box.
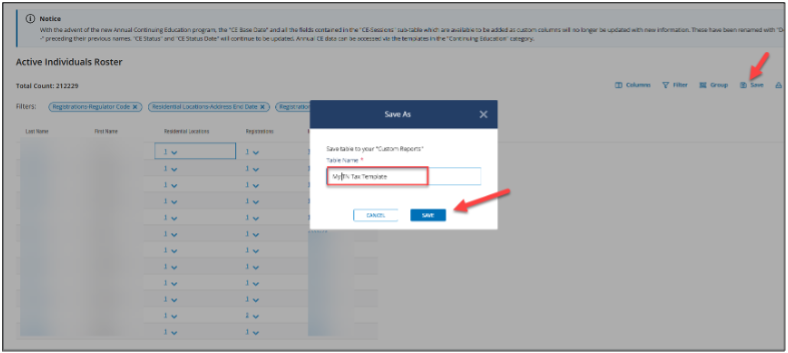
Now that you have created the report that you need, you are ready to save the report. Click on the save icon in the upper righthand section of the report and enter a name for the report in the dialog box that opens. Click the Save button.
You can share this saved custom report with other users by using the share feature.
After saving the report, you are ready to export it.
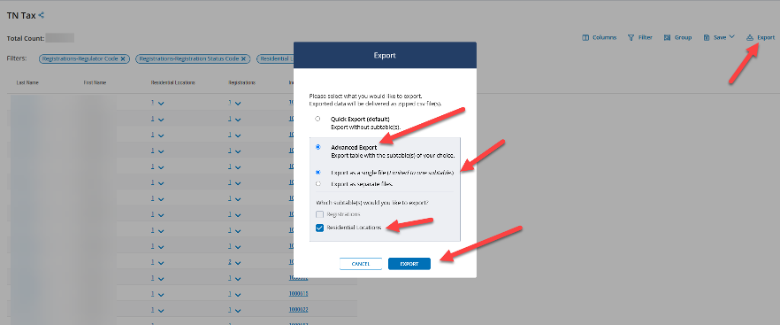
Click on the Export icon in the upper righthand section of the report. Then in the Export dialog box that opens up, select Advanced Export, Export as a Single File, and Residential Locations sub-table by clicking on the radio buttons or checkboxes that apply to them.
Click on the Export button at the bottom of the dialog to export the file.
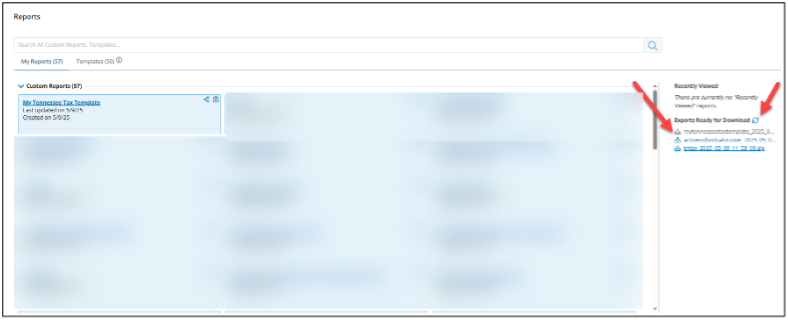
Once the export has been generated, it will show up on the Reports home screen as a blue hyperlink.
If the export file is not ready, it will appear as grey. Clicking on the circular arrow icon will refresh the screen and turn the hyperlink blue when the export file is ready.
Alternatively, you can close reports and come back at a later time to pick up the file. The file will be available for 24 hours after it is generated.
Note
The list you are exporting will include duplicates for the following types of individuals and If you have such individuals in your organization, you will need to remove the duplicates once you have opened the exported list in Excel.
- Individuals with dual registrations
- Individuals with more than one active private residence
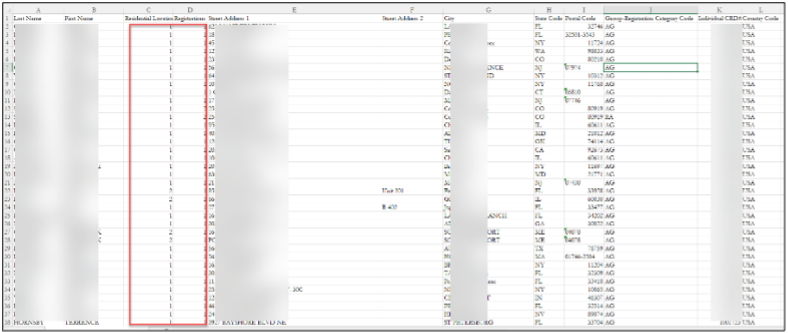
Now open the exported file in Excel to apply the final touches.
Select the Group-Registrations Category Code column, CUT it, and then INSERT it in between the Postal Code and Country Code columns.
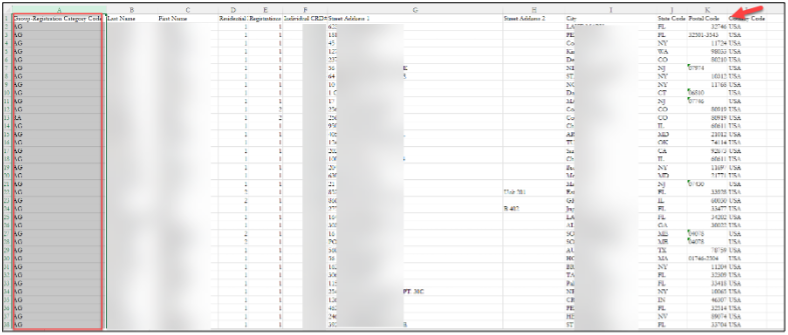
Select the Individual CRD column, CUT it, and then INSERT it in between the Group-Registrations Category Code and Country Code columns.
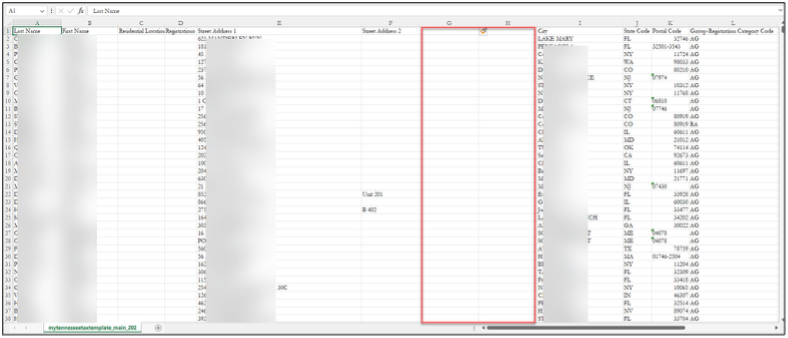
Now select all the data in the Residential Locations and Registration columns and delete it.
Insert two new columns between the Street Address 2 and City columns.
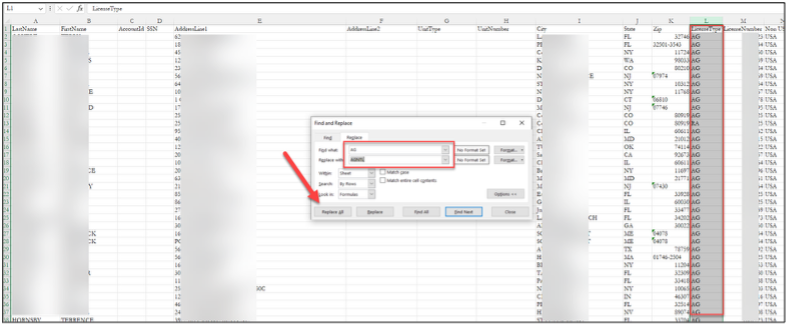
Now rename the column headers as per the Tennessee template requirements:
- LastName
- FirstName
- AccountId
- SSN
- AddressLine1
- AddressLine2
- UnitType
- UnitNumber
- City
- State
- Zip
- LicenseType
- LicenseNumber
- Non US Country Only

Select the LicenseType column, select the Find and Replace tool in Excel and replace all AG with AGNTL and then replace all RA with INADL.
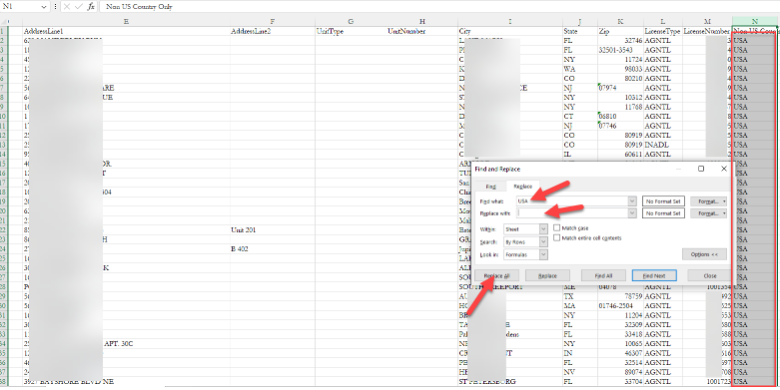
Now to only report Non US Countries, select all the data in the Non US Country Only field, open the Excel Find and Replace tool and replace USA with a blank.
Now your report is ready. Remember to save the report before closing it.